Foxd3710 Graphics Project
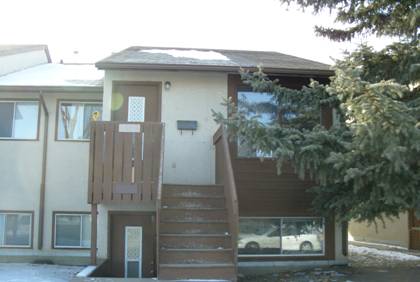
I had some difficulty choosing a subject for my project. As such, I decided to model my house. I decided to use Google SketchUp as I have used it once before.

I used an internal render plugin called Maxwell Fire found on the Google SketchUp website. It is a powerful tool but I couldn’t seem to get it to work correctly.
I did not finish it completely, as I had approached the project in a more technical manner than I should have: I measured and modeled every single dimension of my house into SketchUp, so that I could use the model later in personal endeavors.
To scale modeling was a huge set back, as the interior of the house was modeled, as well as the exterior
A walkthrough of the steps I took.
Step 1
Gather all the dimensions needed, from the house. This involved me running around with a tape measure and a clipboard writing everything down.
It was interesting to see how well, or poorly, my apartment is built, whether or not walls where straight etc. These measurements consisted mainly of the walls of the house and the height and overhang of the roof.
I could not get the measurement page scanned in my computer on time.
Step 2 (draw layout)
Draw the layout in sketchup.
I colored the exterior walls while drawing so that they would stand out from the rest of the model
(later on I just delete floors so is would stand out anyhow)

Step 3 (corrections)
One of the problems I had was that on occasion I would draw something thinking it was one size then finding out it was not quite how I thought it was later, as is shown below.
This wall was supposed to be 4 ½ inches but it was the wrong size so I had to correct it.

Step 4 (more problems)
On occasion I would draw a wall beide where it actually needed to go and as such it would need to be corrected.

Complaint 1
SketchUp would be sticky on some vertex’s and not on others which began to be annoying after a while.

Modeling Error
Apparently, when I went around measuring, I made a mistake in certain areas, which showed up later in the project, and as such need to be corrected.
Below is an example of the hallway, which should have been 2 ft 11 inches but was short on the line I was drawing and long on the wall I was connecting it too, this required several areas to be shifted.

Step 5
Layout is complete and doors and windows are adjusted to a relative size.

Step 6
Extruding all the walls, doors and windows vertically to the appropriate height.

Step 7
Double checking for errors
This was done from a different view point so that I could find them quickly.

Step 8
Adding the Floor

Step 9
Making all the windows and headers above them and the doors, this was a PAIN as perspective had to be changed often to get at all the little cracks.

Step 10
Adding the main roof. I did this higher off the model so that it wasn’t in the way of everything else. This had its own challenge: I needed to translate points from below to above so that things would line up.

Step 11
Adding the secondary roof.

Step 12
Little texturing and roof complete

Step 13
Joining the roof to the house and adding texture
The textures I had gathered to place on the house did not work as I intended them too.
The textures have a shadowing effect in the corner of the pictures and made them unsuitable to use as they would need to be tiled and it did not look correct.
As such I would have to rebalance the photos and modify them in order to get the desire result, which equaled more time.
I attempted to fix the stone stucco but it didn’t quite turn out either. The textures are as follows:
Stone Stucco, Interior Paint, Exterior Paint


Step 14 adding detail and rendering
I did not get to this step
Overall, This project was fairly interesting and I am going to finish off my model entirely on my own time now that I have it to this point.